O3 Implementer Documentation: Set Up, Configure & Deploy
This documentation is intended to enable administrators, implementers, and developers to set up and configure an OpenMRS Frontend 3.0 application (aka 3.x, aka O3). The O3 Project Overview is also helpful.
In This Guide:
- Once you've followed the steps in this Implementer Guide, you can also see the Developer Guide for more guidance on building with the 3.x tooling.
 Looking for a repo? See the Dev Guide's Repositories You Should Know.
  Still confused? Try using the search bar in the Dev Guide to search for a key term:
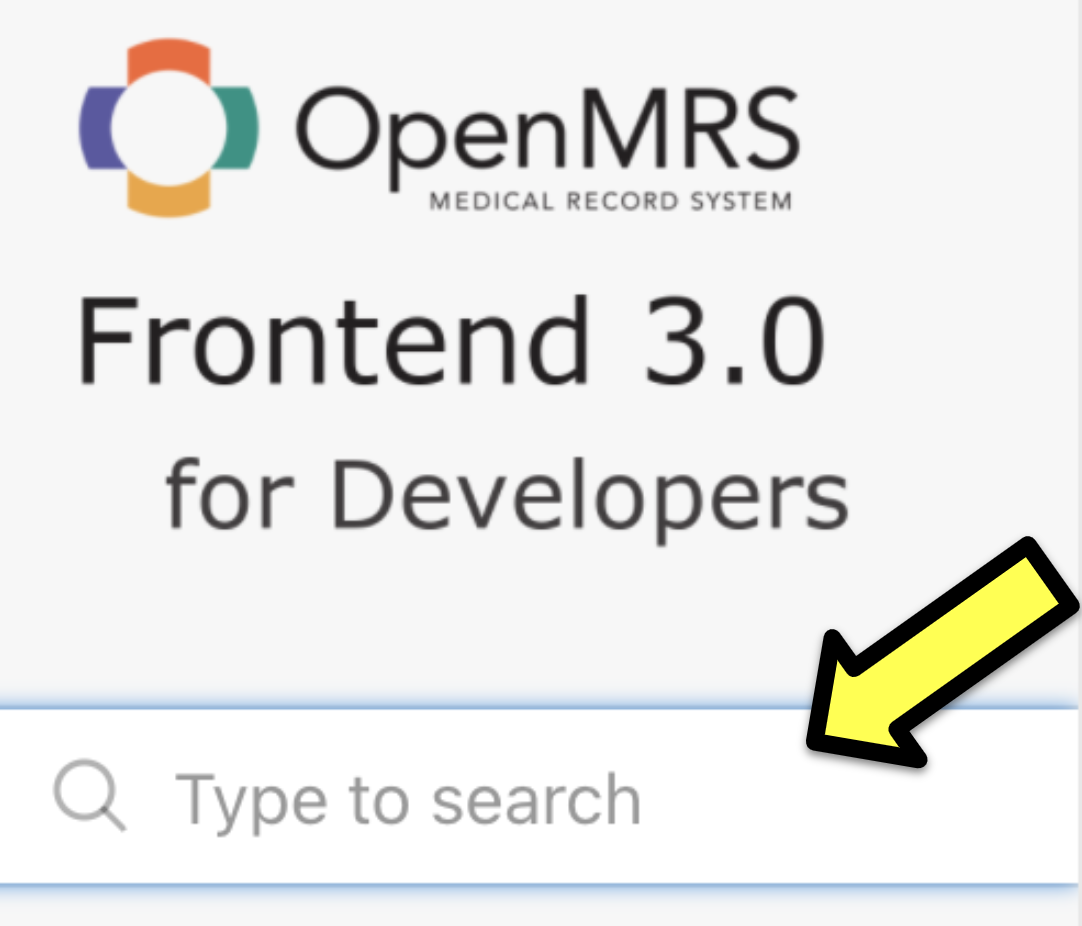
- If you still can't find what you need, please reach out to our 3.x squad on this slack channel: #openmrs-helpme We'd also love to hear from you any suggestions on how to improve this guide!
Orientation
Two Important Qualities of the OpenMRS 3 Frontend
The OpenMRS 3 Frontend has two important qualities:
- It can be served independently of the OpenMRS server itself. It is just static files, and you can use any web server to serve them. They will communicate with the OpenMRS server via network requests (REST, FHIR, etc).
- The frontend modules come together to form the application on the client's computer. This means that the modules can be served independently of the base frontend application.
What is a Frontend Module?
OpenMRS Frontend 3.0 uses frontend modules. A frontend module is a self-contained piece of application. It has some UI, and some ideas about where in the application it should be rendered. Each frontend module can be configured and some aspects of how frontend modules interact can be configured, too.
Important Pieces of the O3 frontend modules system
There are four important pieces of the OpenMRS 3 frontend module system:
- The app shell, which is the "base" of the application and coordinates everything
- The framework, which is a shared library that all frontend modules use
- The import map, which is a file that tells the app shell what frontend modules to use and where they are
- The frontend modules, from which the interface is composed
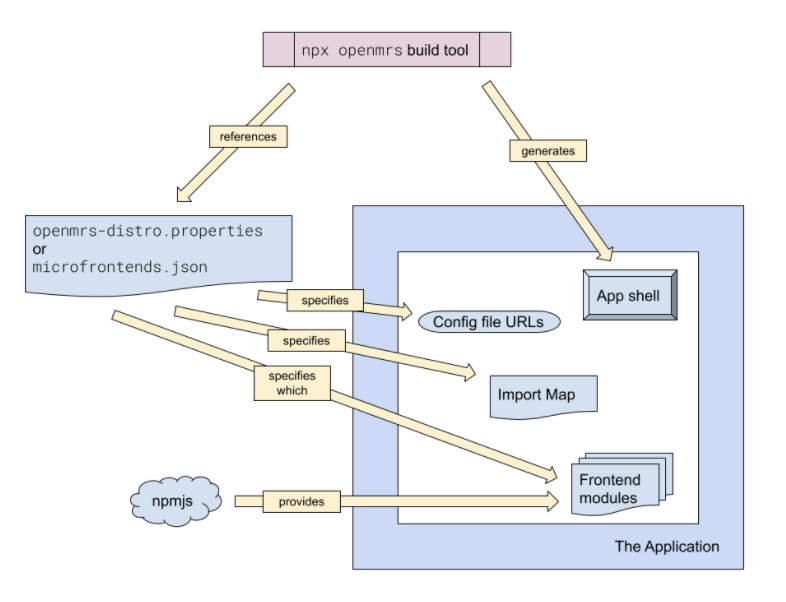
![]() Feeling confused about the pieces of 3.x?
Feeling confused about the pieces of 3.x?
A visual map of building a 3.x application is described in more detail in the Dev Guide's Map of the Project.
Each frontend module is an NPM package with a name ending in -app. Examples shown in the examples below: (Click to expand)
Quick Start Guide: Get O3 running on your machine quickly
You will need a good internet connection for these steps.
1) Install Docker: You will first need to install a program called Docker Desktop on your machine (skip this step if you already have Docker Desktop installed - but double check that you have Docker Compose). Why? Docker will help handle some of the pesky technical tasks for you, like a chef in a kitchen helping you cook! We are trying to make your life easier by using this tool ![]()
Tip: On Macs: Check that you can manually open the Docker app. You will need to agree to some permissions in order for your machine to finish the installation.
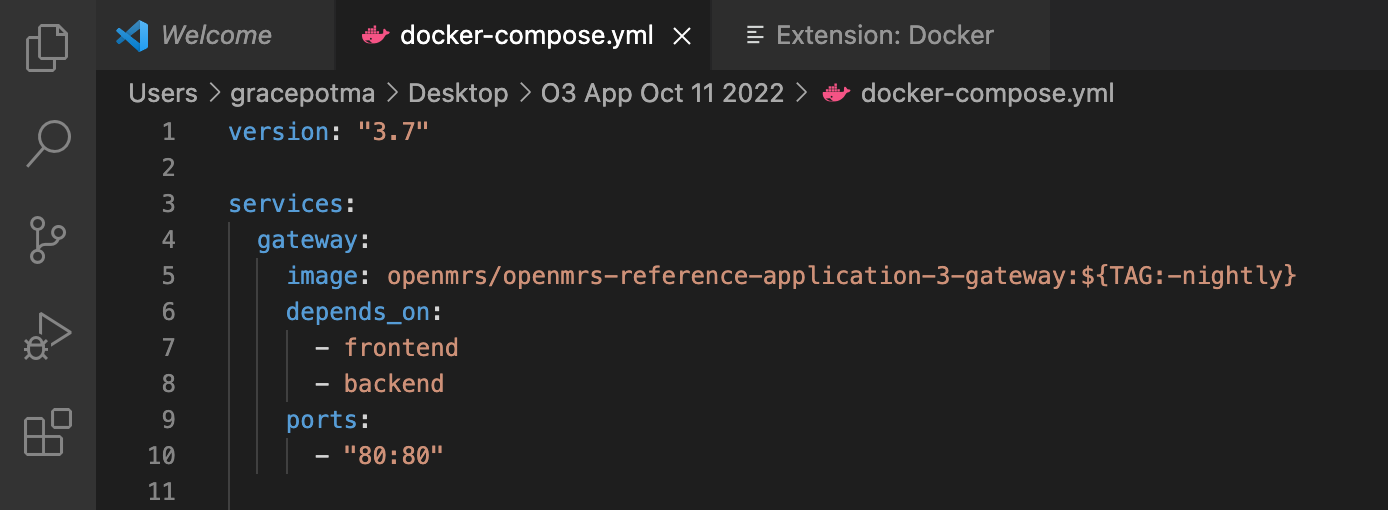
2) Set up the recipe, the "Docker Compose File": The "docker compose" file is like your recipe for getting OpenMRS 3 onto your machine; and Docker is the chef that will do this for you. OpenMRS 3.x is a WIP, but to get the latest version of 3.x running on your machine, use this Docker Compose file. (This file will also share some documentation about the docker images.) Copy the docker-compose.yml file into a blank directory / empty folder on your own computer - eg put it into a directory/folder named "o3-docker-compose", and be sure to name the docker-compose.yml file as "docker-compose.yml".
Example of the contents of the O3 docker-compose.yml file copied into a user's own file in VS Code:
3) Time to get things running!
LINUX:
$ cd /home/YOURUSERNAME/FOLDER/o3-docker-compose
WINDOWS:
C:\Users\YOURUSERNAME\FOLDER\o3-docker-compose
MACS:
% cd /Users/YOURUSERNAME/FOLDER/o3-docker-compose
LINUX:
$ docker-compose up
WINDOWS:
> docker-compose up
MACS:
% docker-compose up
You will start to see lots of lines / activity happening as docker, your chef, uses your docker-compose.yml file as the recipe for all the things it needs to build the EMR on your machine.
You will know you were successful when you see lines like: frontend_1 | 127.0.0.1 - - [12/Oct/2022:00:51:59 +0000] "GET / HTTP/1.1" 301 169 "-" "curl/7.83.1"
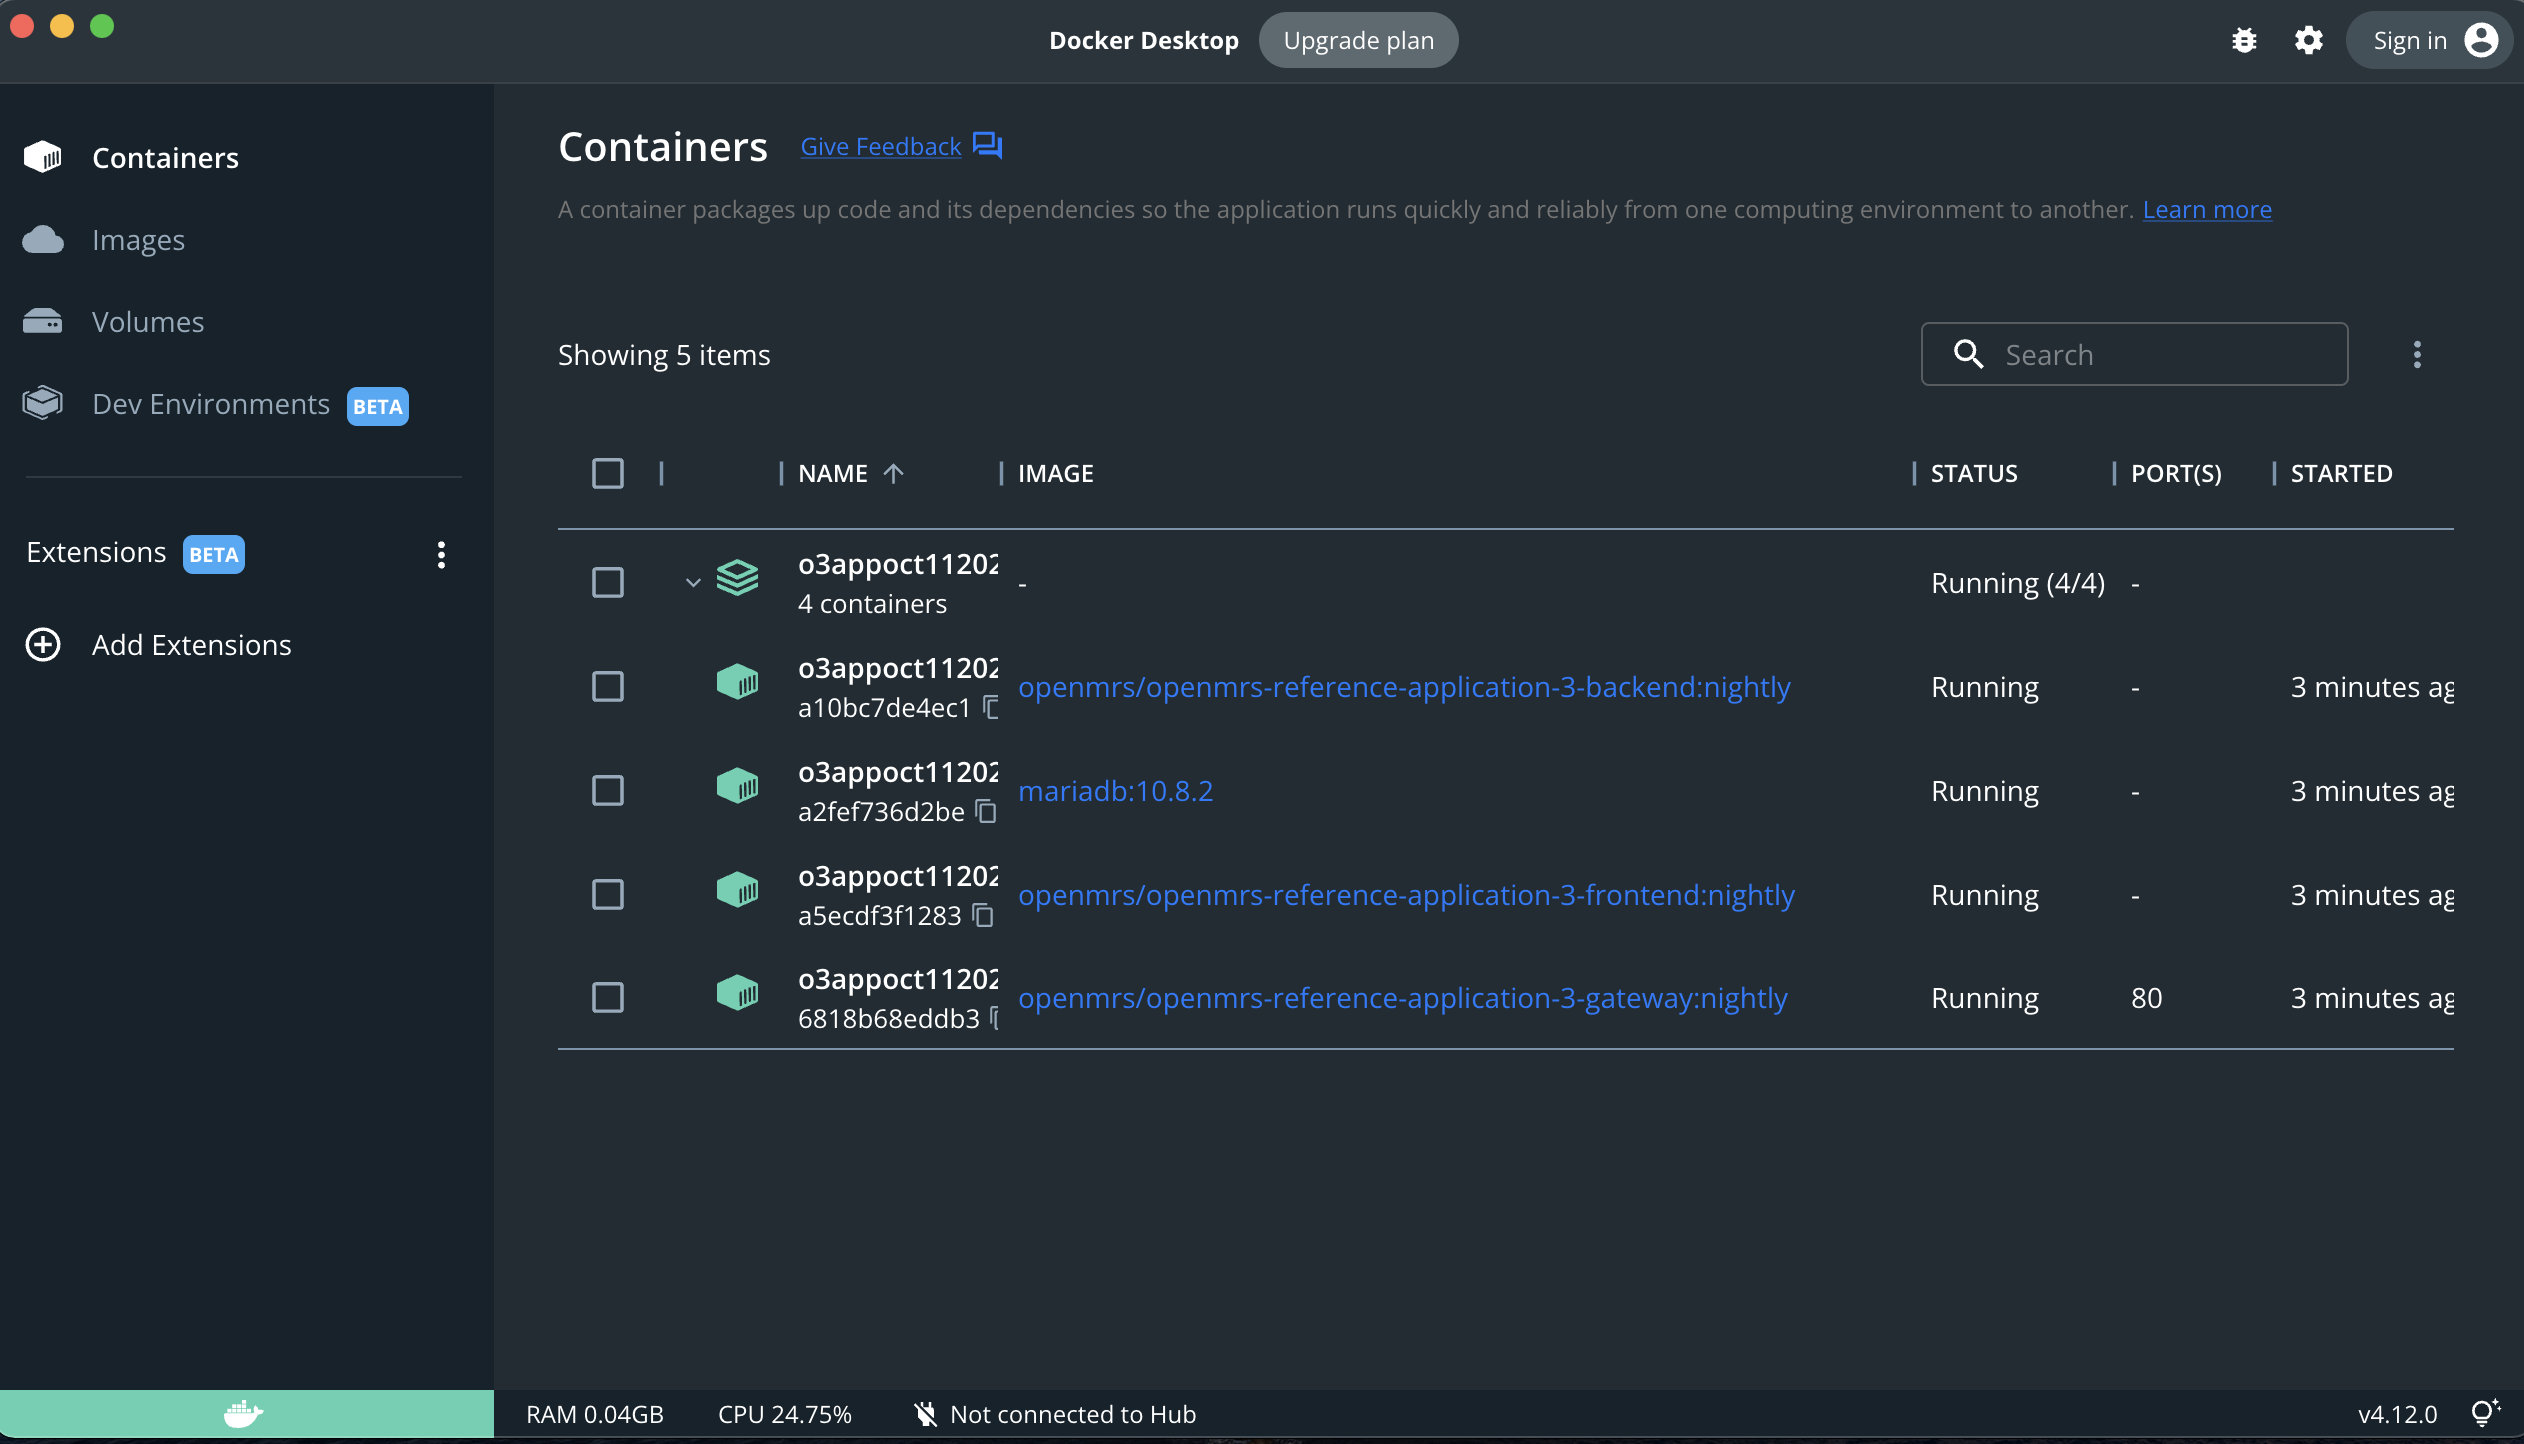
Also check for success by opening your Docker Desktop app - if things have gone successfully, you should see these 4 containers (frontend, backend, gateway, and mariadb):
Reference Docker Containers
Reference Application Docker containers are available as follows.
- If you want the community O3 Reference Application: For O3 RefApp, go to: https://hub.docker.com/u/openmrs You are going to want to:
- docker pull openmrs/openmrs-reference-application-3-gateway
- docker pull openmrs/openmrs-reference-application-3-frontend
- docker pull openmrs/openmrs-reference-application-3-backend
- If you want the specific CDC package called "OHRI", go to: https://hub.docker.com/u/histacoohri. You are going to want to:
- docker pull histacoohri/docker_proxy
- docker pull histacoohri/docker_frontend
- docker pull histacoohri/docker_openmrs
One day this will all be in the OpenMRS SDK...
We are also going to be updating the central OpenMRS SDK docker-compose files so that it has the 3.x docker compose information needed. This will allow current OpenMRS organizations to deploy 3.x with their implementation using the OpenMRS SDK.
Setup OpenMRS 3 With OpenMRS SDK
You can quickly set up an instance of OpenMRS 3 using the OpenMRS SDK. There are two ways to set up OpenMRS 3 with the SDK: using the O3 distribution or a custom distro.properties file.
Prerequisite
Before starting, make sure that:
Setup the O3 distribution with the SDK.
If you are running the SDK for the very first time, install it by opening your terminal and run the following command:
$ mvn org.openmrs.maven.plugins:openmrs-sdk-maven-plugin:setup-sdk
1) To set up a new backend server, run the following command:
$ mvn openmrs-sdk:setup
By default, the SDK will use the next version of OpenMRS SPA core. However, if you prefer to use a specific version, you can manually change it by following these steps:
- Identify the desired version number from the list of available versions. You can find the version list at https://www.npmjs.com/package/openmrs?activeTab=versions.
- In your command line or terminal, run the following command
$ mvn openmrs-sdk:setup -DappShellVersion={version}
To ignore 'peerDependencies' when building the frontend, you can use the following command:
$ mvn openmrs-sdk:setup -DignorePeerDependencies=true
By setting the 'ignorePeerDependencies' property to 'true', you can mitigate the following error:
Module not found: Error: Can't resolve '@openmrs/esm-react-utils' in '/tmp/openmrs-sdk-node11424498487737231975/npm-cache/_npx/9145365975c7e340/node_modules/@openmrs/esm-styleguide/src/error-state'
2) Assign a server ID to your server when prompted.
3) You will be presented with the following options. Select "O3 Distribution".
You can set up the following servers:
1) 2.x Distribution
2) Platform
3) O3 Distribution
Which one do you choose? [1/2/3]:
4) Choose the desired version of O3 when prompted. Enter the corresponding number:
You can deploy the following versions of O3:
1) Reference Application 3.0.0-SNAPSHOT
2) Reference Application 3.0.0-beta.8
3) Reference Application 3.0.0-beta.6
4) Reference Application 3.0.0-beta.2
5) Other...
Which one do you choose? [1/2/3/4/5]:
5) The SDK will install the necessary modules. Follow the prompts to configure the server port, database details, and Java version as required.
6) Once the setup is complete, you can run the OpenMRS 3 instance using the following command:
$ mvn openmrs-sdk:run -DserverId=serverName
7) Now that the OpenMRS server is up and running, you can access it through your web browser. The URL for the OpenMRS server is "localhost:{port}/openmrs" (default: "localhost:8080/openmrs").
8) When you visit the link, OpenMRS will start the initial setup process. After completing the setup, you will be redirected to the legacy login page.
9) To access the OpenMRS 3 UI, you can visit "localhost:{port}/openmrs/spa/" in your web browser.
10) To log in to OpenMRS, you can use the default username and password:
- Username: admin
- Password: Admin123
11) Feel free to explore the OpenMRS 3 interface and start using the features and functionalities of the system.
Set up the O3 with a custom distro.properties file (advanced users)
1) Create a distro.properties file that includes the necessary modules and configuration properties. You can find the module versions in the following links:
- Backend modules: distro.properties
- Module versions: pom.xml
- Frontend modules: spa-assemble-config.json
- SPA module: pom.xml
- Configuration versions: tags
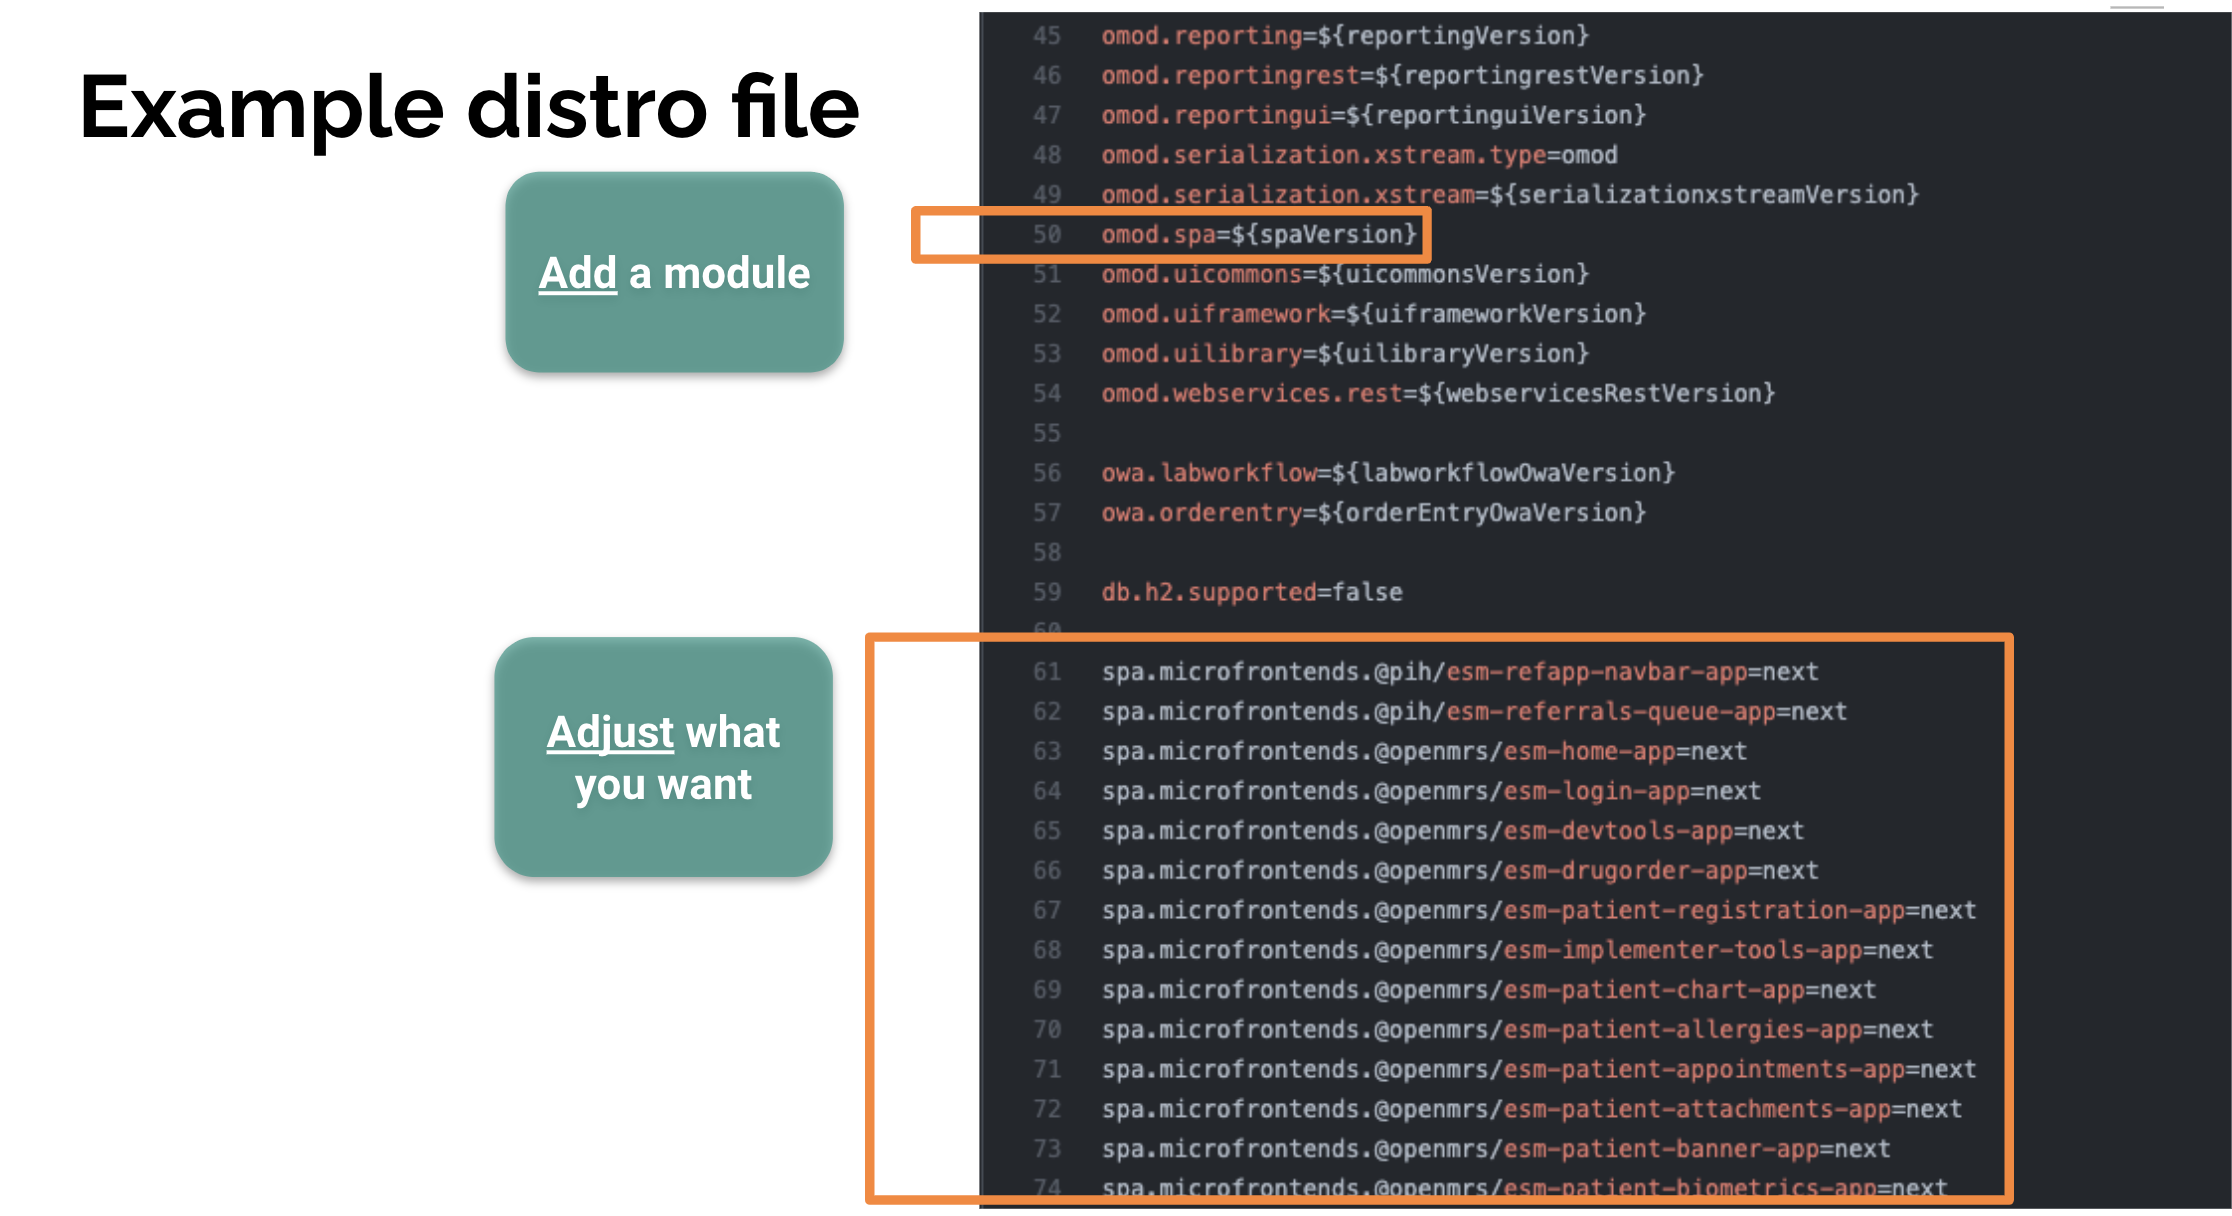
2) our distro.properties file should follow this format:
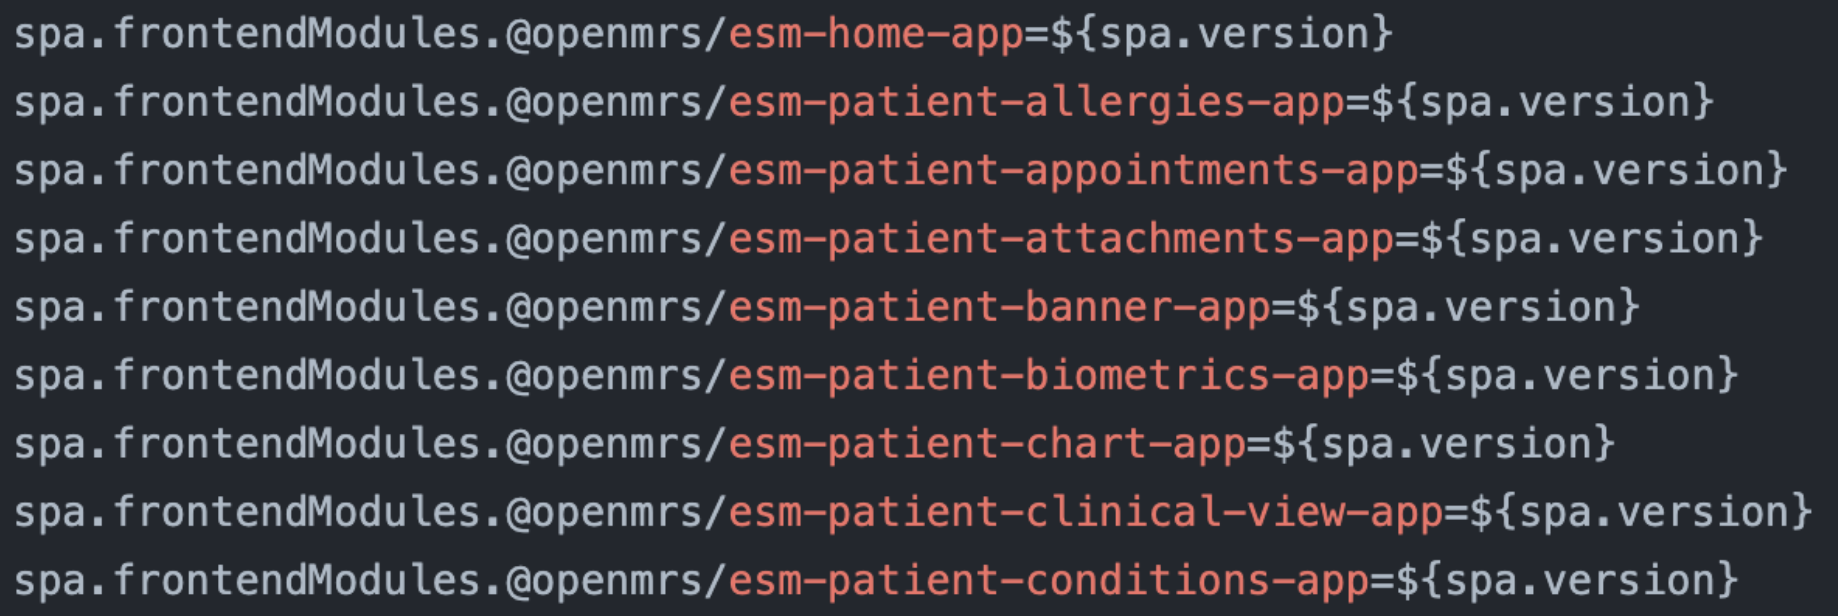
name=Ref 3.x distro
version=3.0.0
war.openmrs=2.6.1-SNAPSHOT
config.referenceapplication-distro=3.0.0-SNAPSHOT
omod.addresshierarchy=2.15.1
omod.appointments=1.6.0
omod.appointments.groupId=org.bahmni.module
omod.attachments=3.0.0
omod.calculation=1.3.0
omod.cohort=3.4.0
omod.fhir2=1.9.0
omod.htmlwidgets=1.11.0
omod.idgen=4.10.0
omod.initializer=2.5.0
omod.legacyui=1.15.0
omod.metadatamapping=1.6.0
omod.metadatasharing=1.9.0
omod.openconceptlab=2.1.0
omod.ordertemplates=1.0.2-SNAPSHOT
omod.owa=1.14.0
omod.queue=1.0.0-alpha.1
omod.referencedemodata=2.4.0-SNAPSHOT
omod.reporting=1.25.0
omod.reportingrest=1.14.0
omod.serialization.xstream=0.2.16
omod.serialization.xstream.type=omod
omod.spa=1.0.10-SNAPSHOT
omod.webservices.rest=2.40.0-SNAPSHOT
spa.frontendModules.@openmrs/esm-active-visits-app=next
spa.frontendModules.@openmrs/esm-appointments-app=next
spa.frontendModules.@openmrs/esm-cohort-builder-app=next
spa.frontendModules.@openmrs/esm-devtools-app=next
spa.frontendModules.@openmrs/esm-dispensing-app=next
spa.frontendModules.@openmrs/esm-fast-data-entry-app=next
spa.frontendModules.@openmrs/esm-form-builder-app=next
spa.frontendModules.@openmrs/esm-form-entry-app=next
spa.frontendModules.@openmrs/esm-generic-patient-widgets-app=next
spa.frontendModules.@openmrs/esm-home-app=next
spa.frontendModules.@openmrs/esm-implementer-tools-app=next
spa.frontendModules.@openmrs/esm-login-app=next
spa.frontendModules.@openmrs/esm-offline-tools-app=next
spa.frontendModules.@openmrs/esm-openconceptlab-app=next
spa.frontendModules.@openmrs/esm-outpatient-app=next
spa.frontendModules.@openmrs/esm-patient-allergies-app=next
spa.frontendModules.@openmrs/esm-patient-appointments-app=next
spa.frontendModules.@openmrs/esm-patient-attachments-app=next
spa.frontendModules.@openmrs/esm-patient-banner-app=next
spa.frontendModules.@openmrs/esm-patient-biometrics-app=next
spa.frontendModules.@openmrs/esm-patient-chart-app=next
spa.frontendModules.@openmrs/esm-patient-conditions-app=next
spa.frontendModules.@openmrs/esm-patient-forms-app=next
spa.frontendModules.@openmrs/esm-patient-list-app=next
spa.frontendModules.@openmrs/esm-patient-medications-app=next
spa.frontendModules.@openmrs/esm-patient-notes-app=next
spa.frontendModules.@openmrs/esm-patient-programs-app=next
spa.frontendModules.@openmrs/esm-patient-registration-app=next
spa.frontendModules.@openmrs/esm-patient-search-app=next
spa.frontendModules.@openmrs/esm-patient-test-results-app=next
spa.frontendModules.@openmrs/esm-patient-vitals-app=next
spa.frontendModules.@openmrs/esm-primary-navigation-app=next
3) Run the following command, providing the path to your distro.properties file:
$ mvn openmrs-sdk:setup -Ddistro=distro.properties
Creating Docker Configuration for OpenMRS 3 Distribution Using the OpenMRS SDK
1) Open your terminal and run the following command
$ mvn openmrs-sdk:build-distro
2) When prompted to specify the build directory for generated files, press Enter to accept the default value 'docker', or enter a different directory name if desired.
Specify build directory for generated files (-Ddir, default: 'docker') (default: 'docker'):
3) You will be presented with the following options. Select "O3 Distribution".
You can setup the following servers:
1) 2.x Distribution
2) O3 Distribution
4) Choose the desired version of O3 when prompted. Enter the corresponding number:
You can deploy the following versions of O3:
1) Reference Application 3.0.0-SNAPSHOT
2) Reference Application 3.0.0-beta.9
3) Reference Application 3.0.0-beta.8
4) Reference Application 3.0.0-beta.6
5) Reference Application 3.0.0-beta.2
6) Other...

Which one do you choose? [1/2/3/4/5/6]:
5) After the build process completes, open your terminal and navigate to the build directory you specified in step 2. Run the following command to start the O3 distribution using Docker Compose:
$ docker compose up
Part 1: Build and Deploy the OpenMRS 3 Frontend
Backend Pre-Requisites
If you don't yet have an OpenMRS backend set up, follow these instructions first. (Note: Recommended version numbers are shown here because systems based on recent OpenMRS platform versions (v2.4.0+) will be able to run these, and older versions of MySQL and Tomcat having been End-of-Lifed by their supporters.)
- Install Java (v11)
- Install MySQL (v8) - Create “openmrs” database, “openmrs” database user and grant privileges on the “openmrs” database to the “openmrs” user.
- Install apache-tomcat-8.5 or 9
- Install nginx. Configure nginx to proxypass to tomcat.
- Download the OpenMRS Platform war file and place it in tomcat’s webapps directory.
- Start tomcat. Open a browser and navigate to the address configured in nginx. Follow the installation setup and get OpenMRS platform running.
if it’s for development or to build a distro, we’d still recommend using the SDK rather than doing everything by hand. For building a distro with the SDK, you’ll at least need to install Maven. If you want to build a distro without the SDK or setup the frontend, you’d need a recent version of Node. Only developers need Git.
You can skip setting up nginx unless you’re actually deploying to production. It’s not a value-add to have it running locally.
Frontend Pre-Requisites
In order to successfully build the OpenMRS frontend, you will need to have appropriate versions of Node and NPM installed. The appropriate version will vary depending on the versions of frontend modules you are using, but the general rule of thumb is that the latest community-supported releases should support the active LTS version of NodeJS at the time of release. At the time of writing (June 2022), this is Node 16.15.1 and NPM 8.11.0. Newer versions of Node and NPM are likely to be supported, but substantially older versions will likely not work. Note that if you use the OpenMRS SDK option to build the frontend, an appropriate version of Node and NPM will be installed for you.
Step 1: Choose your install / serve path
There are several ways to deploy the OpenMRS 3 Frontend, depending on your needs and technical capabilities. Here we will cover 2 options–deploying the frontend using Tomcat and the OpenMRS WAR or deploying the frontend using nginx:
- Option 1: OpenMRS Server: Install using OpenMRS tooling + Apache Tomcat. In this case, you will build and assemble using the OpenMRS SDK and served from the OpenMRS server itself using the OpenMRS SPA Module. This is the simplest kind of deployment. Implementations with many Java-familiar team members, who know Tomcat inside and out, may strongly prefer this approach. This also simplifies your architecture as there is only one server involved.
- Example distribution using this approach: Palladium
- Option 2: Web Server: Serve the frontend using nginx, Apache server etc. This approach enforces separation from the backend; the frontend runs completely independently. This ensures that your frontend will run regardless of whether the backend stops sucessfully, etc. Teams concerned about load balancing may prefer this approach. (Of course, if the backend fails, you won't be able to use the frontend client, but the separation between frontend and backend gives you a way to communicate to the user that there is something wrong with the backend. Whereas for users using the OpenMRS server/Tomcat approach, their system might be entirely inaccessible.)
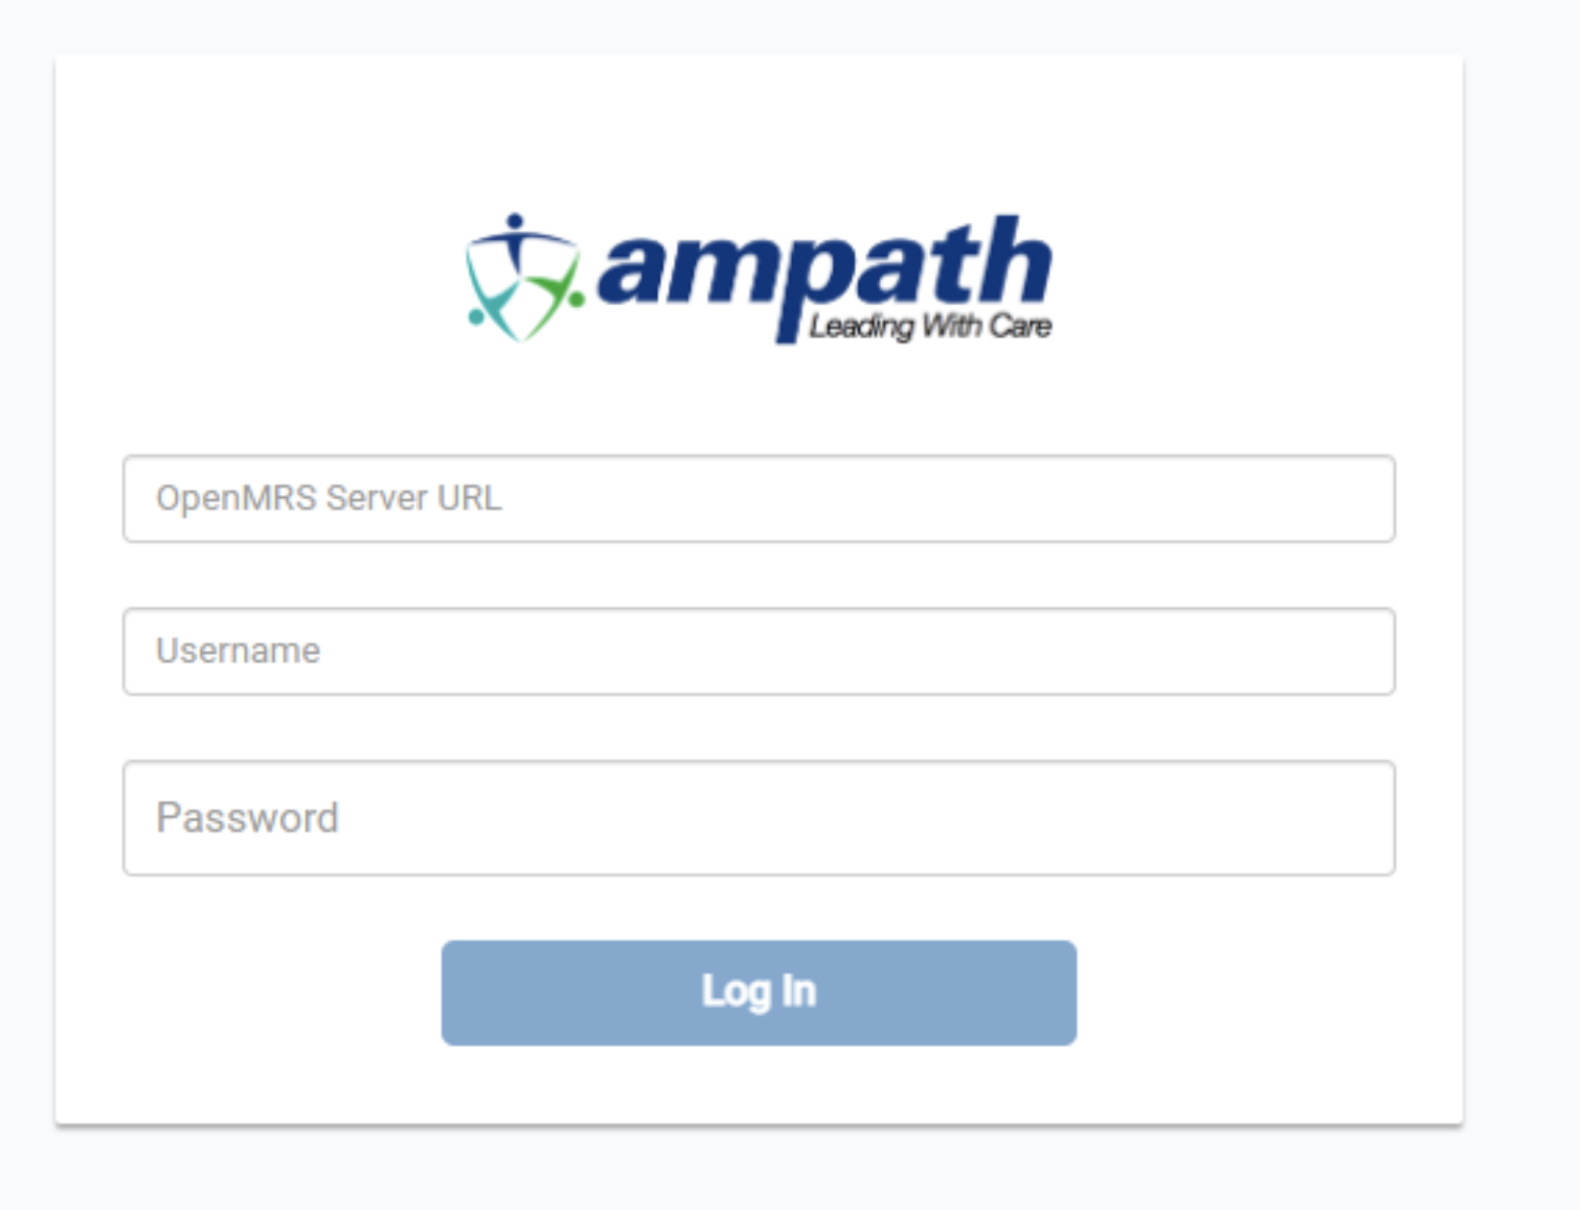
- Example distribution using this approach: AMPATH
Step 2: Add Essential Modules
The following modules are essential to run the O3 frontend (note: if these modules are new to you, just install the latest version of each).
- FHIR2 Module (1.2.2+)
- REST Module (2.24.0+)
- SPA Module (1.0.8+) (only required if you want to serve from Tomcat; not needed for the nginx approach)
- ID Gen (4.6.0+)
These are the key to communication with your existing OpenMRS backend. Add these modules to your environment (i.e. your existing implementation).
Step 3: Assemble, Build, and Serve
There are 2 ways of building the frontend:
Run mvn openmrs-sdk:build-distro with a distro.properties file
- Use the npx openmrs build and npx openmrs assemble commands.
Below we will give some additional guidance depending on your Server choice; however, both of these above approaches are valid for either method of deployment.
It's where the files get served from that we branch this guide (based on your decision to use an OpenMRS Server or a Web Server).
Time to choose your own adventure: OpenMRS Server Option OR Web Server Option
A Note on Versions
OpenMRS ESMs are released with three different tags: "next", "latest", and a version number. The version number always refers to a specific build of each ESM, e.g., 3.2.0 or 3.2.1-pre.1067 are both specific versions of the @openmrs/esm-api ESM, though the latter is a pre-release version. "latest" always refers to the most recent released version of an ESM (e.g., 3.2.0). "next" always refers to the most recent pre-release version of an ESM (e.g., 3.2.1-pre.1067). While you are free to go with the "latest" version of any ESM, you may wish to have more control by specifying the exact version number of each ESM you use.

OpenMRS Server Option
3.1: Building with the SPA Module
First, assemble your import map + assets (See Customizing the Import Map if you're still confused.) You'll use tooling to run the assemble command, and you'll provide basic config like the apiURL, spaPath.
The OpenMRS SPA Module serves the application from the <server_dir>/frontend/ directory.
- Move the 3.x-Application Files into the frontend directory. The OpenMRS SDK will build the Frontend 3.0 application in the
frontend/directory within the server directory when the distro file contains any frontend modules. The Frontend 3.0 application is installed whenopenmrs-sdk:install,openmrs-sdk:deploy, oropenmrs-sdk:build-distroare executed. For an example of how to add frontend modules to the distro file, see the distro.properties file for Reference Application 3.x.
Frontend modules should be specified in the distro.properties file in the following format:
spa.frontendModules.<package-name>=<version>
<version> can be any version number or any tag published for that package in npmjs.
The other properties accepted by the OpenMRS SDK for the frontend application are
    spa.spaPath
    spa.apiUrl
    spa.configUrl
    spa.importmap
    spa.publicUrl
These are described in the frontend tool help documentation. Execute
npx openmrs@next --help
npx openmrs@next build --help
to read more about them. You will need to have NPM installed as well as the frontend tool ( npm install -g openmrs ).
You should wind up with the file <server_dir>/frontend/index.html , alongside directories with the names of the microfrontends you are using. When you run your server, you should be able to access your application at /openmrs/spa/login , assuming you have included @openmrs/esm-login-app .
3.2: Serve step: SPA Module Route
Once you have your application files together, you will need to serve them from somewhere. You can technically serve them from anywhere—from a simple file server or a docker container.
One option is to serve these files using the OpenMRS server itself, using the OpenMRS SPA Module. Here's how to use this option to serve a frontend application that you have built:
Install the SPA module as you'd install any other module. Then drop your OpenMRS Frontend 3.0 application files into <server_dir>/frontend , where <server_dir> is the application data directory. So on an SDK server called "narnia" on a *nix computer, you would put the files in ~/openmrs/narnia/frontend/ . On a Tomcat server, the files would go in ~tomcat7/.OpenMRS/frontend/ . If you then start this server on port 8080 and navigate to http://localhost:8080/openmrs/spa/login , the SPA Module will attempt to serve the file at frontend/index.html . The "login" part of the path doesn't matter—in a SPA like OpenMRS Frontend 3.0, the index.html file is always served, and handling the specific route is left to the application itself.
See this implementer’s real-world distro.properties example on GitHub here.
Web Server Option
3.1: Building and assembling the application using the build tool
First, assemble your import map + assets (See Customizing the Import Map if you're still confused.) You'll use tooling to run the assemble command, and you'll provide basic config like the apiURL, spaPath.
Note: If you’re serving using nginx: have an nginx config. If using docker: make sure to move things into the correct directories for nginx.
You do not need to use the SDK to build the frontend application. This may be preferable if you want to build the frontend application separately from your SDK build/deploy tasks. To do this, use the frontend tooling, npx openmrs , directly. This is the same tooling as used by the SDK, described above. The resulting files can be served from any file server, or from the OpenMRS server itself (as described above).
The following command will build the app shell. This includes the framework, as well as the index.html file which will serve as the entrypoint to your application.
npx openmrs build
Remember that many commands will provide helpful information when run with the --help flag. The various features of npx openmrs offer command line flags that you can use to get the application set up according to your needs. Try the following command, for example:
npx openmrs build --help
At this point we still need an import map and the frontend modules. In most cases, we will want to package the whole application and serve it together. We can assemble an import map and frontend modules using the following command:
npx openmrs assemble
At this point, you should have an application that you can serve.
3.2: Serve step: Serving frontend modules from a nginx
Once you have your application files together, you will need to serve them from somewhere. You can technically serve them from anywhere—from a simple file server or a docker container. The easy solution here is to move the files into the nginx webroot (this is set in the nginx.conf file and usually points to /var/www/html on Linux).
Since the frontend modules of the application come together on the client, they do not necessarily need to be packaged with the app shell. This can be an advantageous setup if you want to be able to deploy updates to frontend modules without having to modify files on the server itself.
To do this, you will need to assemble your import map manually. Run npx openmrs assemble and look at the resulting import-map.json file so that you have an idea of what the import map should generally look like. The entries of your import map, however, will have values that refer to remote places where the package is served. An example line might be
"@openmrs/esm-login-app": "https://unpkg.com/@openmrs/esm-login-app@3.1.0/dist/openmrs-esm-login-app.js"
Note that you should not use unpkg as your CDN; it is a free service which provides no uptime or support guarantees.
You may be tempted to import all possible OpenMRS esms into your import map, but the outcome may cause a rendering mess.
We recommend referencing the default assemble / list of esm modules listed in the 3.x Reference Application here.
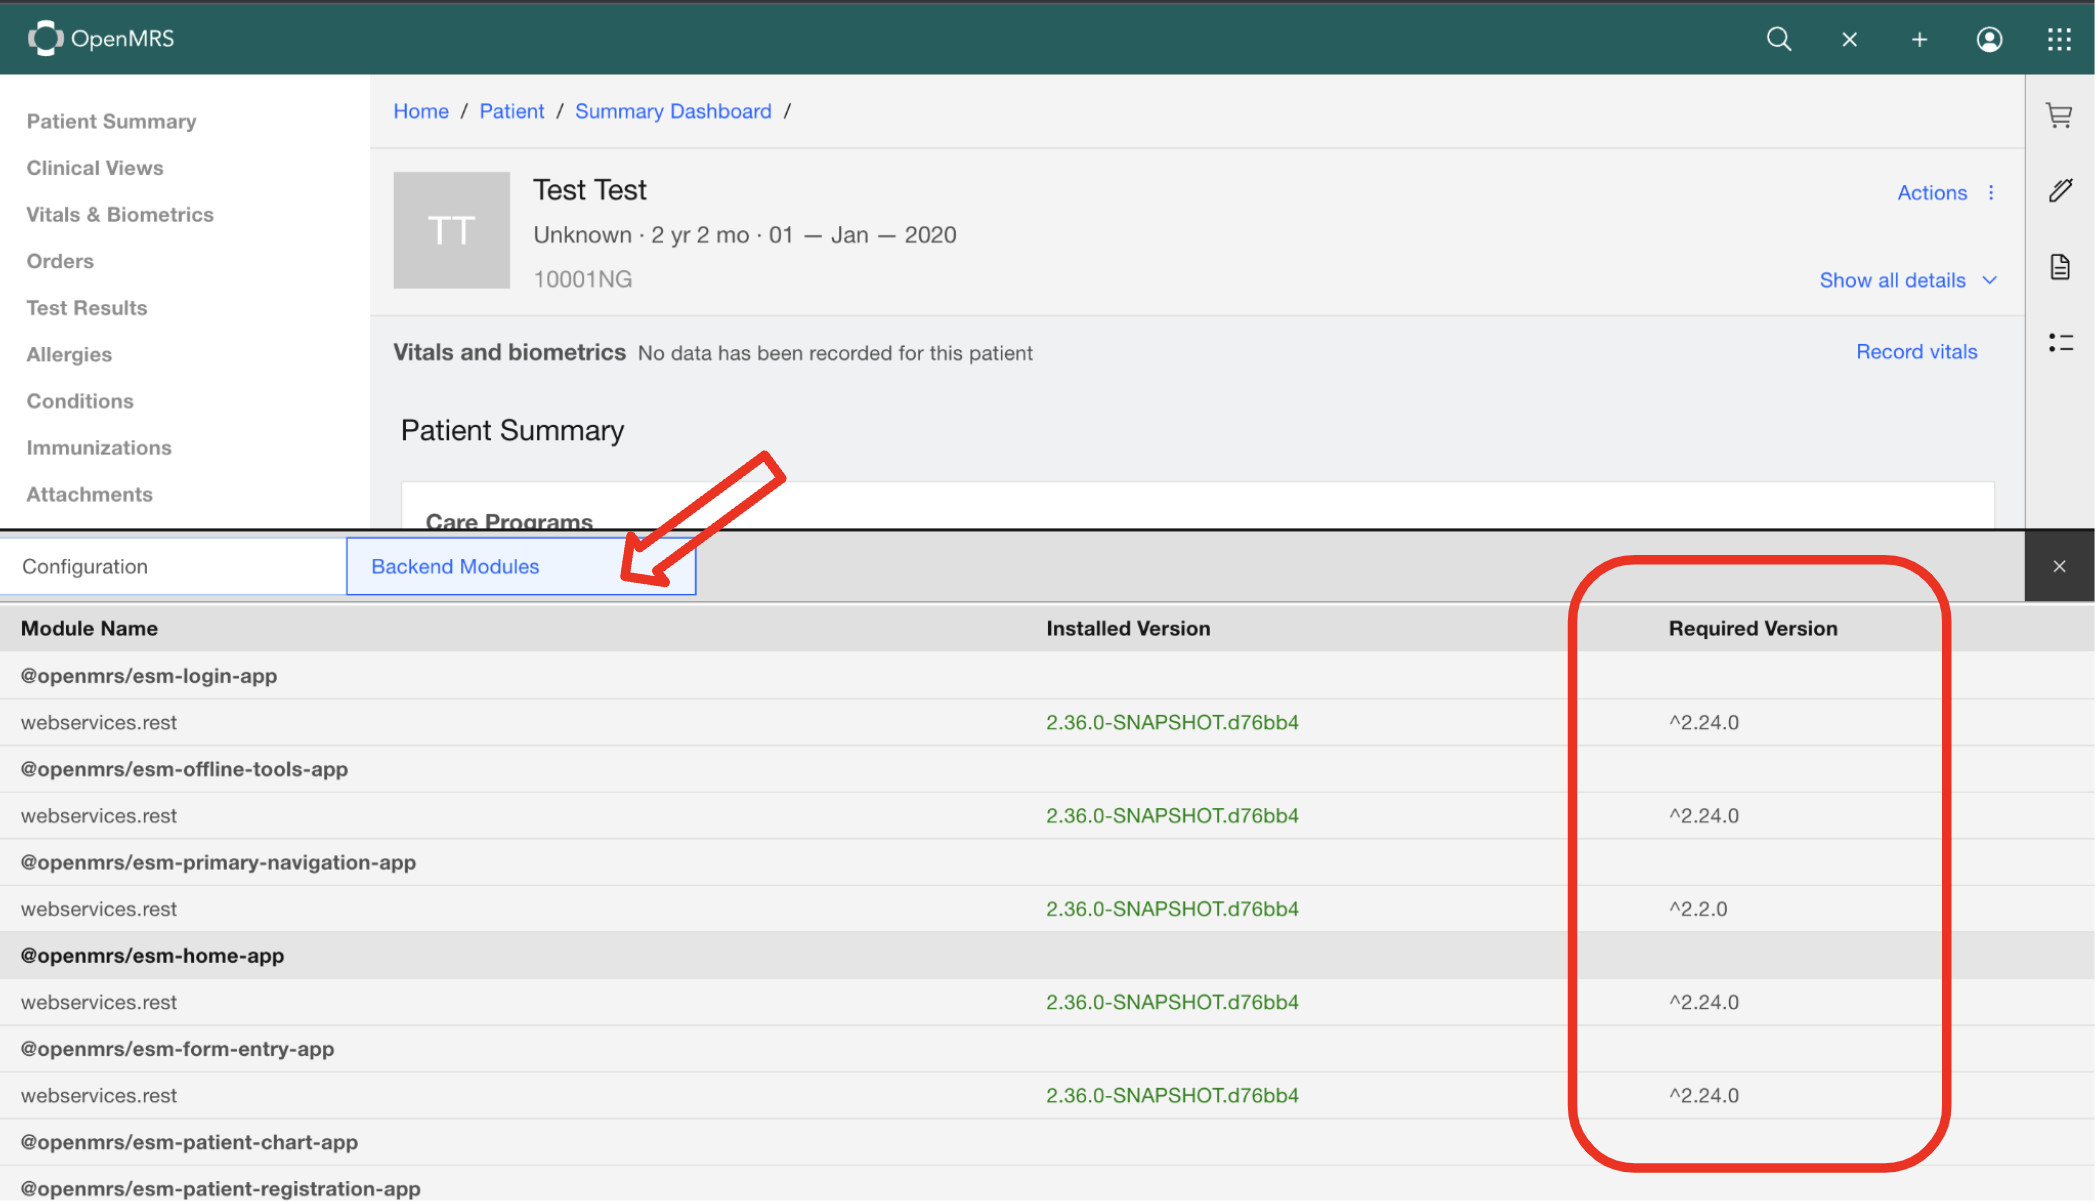
Step 4: Check your backend dependencies using the O3 Implementer Tools
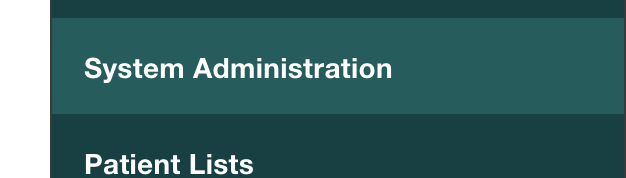
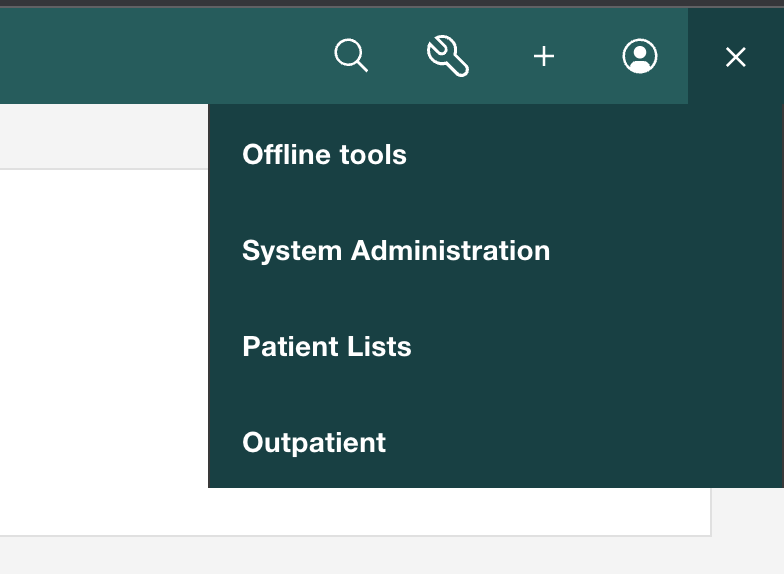
- Go to your O3 environment and sign-in as a system administrator.
- Click the Implementer Tools icon to open the implementer tools (only visible to Admin users).
- Click the tab called Backend Modules
- Scroll through the list to see the Required Version of your modules to adequately support your O3 interface.
Step 5: Pick the esms you want
O3 Apps Directory: https://om.rs/o3apps
Before you clone or fork an O3 repo: What you should know
Ask yourself a few questions:
- Are we willing and able to maintain this code for the forseeable future? Yes, it might be easier/faster to build it ourselves now, but do we want to be on the hook to maintain this ourselves in 1 year? 3 years? The repos that are part of the OpenMRS organization on GitHub - especially anything used by the O3 RefApp - benefit from support from OpenMRS Community members like volunteers, senior devs at aid organizations, contractors, and a small number of staff to maintain them.
- Have we searched the O3 App Directory and the OpenMRS Talk forum to check that someone else hasn't already built this idea?
We especially advise against cloning/forking/customizing esm-core, because:
(1) esm-core is literally the core of the O3 product, and this would essentially fork yourself from the O3 product, and;
(2) We maintain esm-core through time from Senior Frontend engineers from all over the world - often with specialized expertise in microfrontends. This means the costs of forking and maintaining a forked version of core will be immense.
What should I do if I have feedback for esm-core or a specific feature/esm app?
We welcome feedback! (Note that as OpenMRS has extremely limited central resources, change requests are more likely to happen if you can also contribute some resources - many orgs working on O3 make their desired features happen by partnering with other groups and co-sharing resources (e.g. BA time, designer time, dev time, etc) - see live examples of this in the Care section of the Product Roadmap here, where the blue tags show you the orgs working together to make a feature happen.)
Examples: How to share feedback & make change happen | ||
|---|---|---|
1) Use any of these forums to share your idea. The more detail the better so folks can understand the reasons behind your interest/concern. Some folks use recorded videos eg via Loom. | ||
O3 Squad Calls | Dev blockers, dev ideas/concerns. Meets on Zoom weekly every Thursday - see live Events calendar here for the latest time & call link. | Example: |
O3 Product Design Calls | New feature ideas, wireframe sharing & mockup feedback, requirements discussions. Meets on Zoom weekly every Monday - see live Events calendar here for the latest time & call link. | Example: |
OpenMRS "Talk" Forum (Join Talk here) | We even track all O3-relevant topics by using the label "o3". | Example: |
OpenMRS Slack (Join our Slack here) | Either the #openmrs3 or the #openmrs3-helpme channel. Easy way to start sharing an idea to gauge interest. #ux-design-advisory | Example: |
| Github RFCs (for big changes with large impacts) | Once you have enough details on how you would technically like to implement an idea/change, you are also welcome t | Example: |
| 2) | ||
| Partner with another Organization using O3 | Many orgs working on O3 make their desired features happen by partnering with other groups and co-sharing resources (e.g. BA time, designer time, dev time, etc). Benefits: Less people per org and faster time, more use in production, completeness of requirements, and shared future maintenance burden. | Example: See the Care section of the Product Roadmap here, where the blue tags show you the orgs working together to make a feature happen. |
Step 6: Celebrate! 
We'd love to hear from you if you successfully set up O3. Please share your success with us by posting on talk.openmrs.org that you were successful. And if you ran into any issues, please share those, and feel free to update this documentation!
Example Distribution
To create an example distribution using the OpenMRS 3.0 SPA as frontend you'll need to think of three things:
- The app shell (namely what settings you'll need to include it)
- What frontend modules to include (their names and versions)
- The configuration for these frontend modules
The parts of (2) and (3) also flow in directly or indirectly into the settings defined for (1).
Let's start with (1):
npx openmrs build --spa-path /openmrs/spa/ --api-url /openmrs/ --config-url config.json --importmap importmap.json
Using this command you'll build a new app shell that will be placed at /openmrs/spa/. The OpenMRS API is supposed to be on the same server (at least reachable from the browser) at /openmrs/ (e.g., a call to /openmrs/ws/rest/v1/session yields the session, so /ws is rooted at /openmrs).
The command above also defines two more things: The frontend modules from (3) are determined by an importmap.json which will be available in the same directory as the SPA (i.e., reachable at /openmrs/spa/ from the browser). Likewise, a configuration file is specified; the file config.json will be loaded from the SPA's path, too.
Now that you'll have your files for the app shell its time to look at how to get the remaining ones.
The frontend modules from (2) can be assembled using:
npx openmrs assemble --mode survey
This will run a command-line survey iterating over all (publicly) available frontend modules. If included, the survey will ask you what version to take.
Once completed, you'll have a valid importmap.json as well as a directory with all files corresponding to the different frontend modules referenced in this importmap.json.
Finally, you'll also need a configuration. Ideally, you can just write some JSON that represents such a configuration, however, in the real world this will not be so easy.
Our recommended approach is to actually start with an empty JSON file just containing {}. With this empty configuration you can fire up your application shell and actually set it all up as you want to. The frontend module @openmrs/esm-implementer-tools-app will help you to do exactly that.
When you completed your customization in the frontend you can download your individual config.json. Now you can put it besides all the other files to complete your own distribution.
Known Issues
- FHIR and FHIR2 clash on older Platform versions (2.0-2.3.x): Platform versions 2.0.0-2.3.x came with the old FHIR module (v1) pre-bundled. FHIR2 wasn’t bundled until Platform 2.4. Adding the new FHIR2 OMOD while using one of these older platform versions conflicts with the bundled v1 FHIR module. If your Platform version is still running the original FHIR module, remove that module and install the FHIR2 module. Talk Thread for more details and questions here.
- Cohort Module version <=3.0.0-SNAPSHOT can break the application when deployed with openmrs-module-emrapi: There is a fix for the Cohort Module that fixes this. See this talk thread for details.
- SQL issues when using the Initializer module: Apparently these can begin to challenge each other. More information to come. We suspect the initializer module and other modules that insert data needs to update/insert instead of just inserting data.
- npx openmrs build fails on npx version 8.*.?. Current working build uses npx version 6.14.15, node v16.13.0
- FHIR module liquibase error on 1.3.0 - Deploying v1.2.1 and then updating sequentially to 1.3.0 should run migrations needed and solve the issue.
- See Also: O3 Dev Docs FAQs o3-dev.docs.openmrs.org/#/main/faq
Part 2: Configure Your O3 Application
What an OpenMRS 3 frontend configuration file looks like
OpenMRS 3 frontend configuration files are JSON files containing module names as top-level elements. All configuration elements are optional. The available configuration elements for each module should be documented in the module’s wiki page or README file.
Here’s an example:
{
  "@openmrs/esm-login-app": {
    "logo": {
      "src": "https://pbs.twimg.com/media/C1w_czvWgAAWONL.jpg"
    }
  },
  "@openmrs/esm-home-app": {
    "buttons": {
      "enabled": false
    }
  }
}
Alternatively you can provide your config file as a JavaScript file. It will look just about the same, but with some magic words at the beginning:
exports = {};
exports.default = {
  "@openmrs/esm-login-app": {
    logo: {
      src: "https://pbs.twimg.com/media/C1w_czvWgAAWONL.jpg"
    }
  },
  "@openmrs/esm-home-app": {
    buttons: {
      enabled: false
    }
  }
}
How to configure your OpenMRS 3 implementation
You can pass --config-url parameters to the build tool npx openmrs build.
The following command will build an application that looks for config files at the URLs /openmrs/spa/abc/config.json and https://example.com/config.json :
npx openmrs build --config-url abc/config.json --config-url https://example.com/config.json
Config files will be merged, with values from subsequent files overriding those coming previously. For example, if abc/config.json has contents
{
  "@openmrs/esm-login-app": {
    "logo": {
      "src": "https://pbs.twimg.com/media/C1w_czvWgAAWONL.jpg",
      "alt": "Our beautiful logo"
    }
  }
}
and https://example.com/config.json has contents
{
  "@openmrs/esm-login-app": {
    "logo": {
      "alt": "Our all-star logo"
    }
  }
}
Then the login page will display the logo given by the first config and the alt text given by the second config.
In this way, you can break up your configuration files into hierarchies, per module, per groups of modules, or however else you please.
See npx openmrs build --help .
Configure your Branding
You can configure your branding in a few ways. Ultimately this will live in your config.json file - see the OHRI example one here in GitHub or expand the box below:
Adding the Logo
This needs to be configured as follows:
For the Login Screen: in the openmrs/esm-login-app (sample config below)
For the Banner: in the openmrs/esm-primary-navigation-app (sample config below)
{
  "@openmrs/esm-login-app": {
    "logo": {
      "src": "https://pbs.twimg.com/media/logo.jpg",
      "alt": "Our beautiful logo"
    }
  },

  "@openmrs/esm-primary-navigation-app": {
    "logo": {
      "src": "https://ohri-demo.globalhealthapp.net/openmrs/images/logos/ohri_logo_darkbg.svg"
    }
  }
}
Changing the Colors
This can be configured via the openmrs/esm-styleguide module with these configuration elements
{
  "@openmrs/esm-styleguide": {
    "Brand color #1": "#00473F",
    "Brand color #2": "#363463",
    "Brand color #3": "#51A351"
  }
}
O3 Branding Tutorial
Legend for impact of Primary, Secondary, and Tertiary colors:
Brand color #1 (Primary Color) |
|
|---|---|
Brand color #2 (Secondary Color) |
|
Brand color #3 (Tertiary Color) |
|


Configure the Patient Chart Navigation: Pages & Dashboards
you can configure the patient chart navigation by adding an extension to the patient-chart-dashboard-slot of the esm-patient-chart-app
{
  "@openmrs/esm-patient-chart-app": {
    "extensionSlots": {
      "patient-chart-dashboard-slot": {
        "add": [
          "nav-group#HIVAdultReturn",
          "nav-group#NCDOutpatient"
        ],
        "configure": {
          "nav-group#HIVAdultReturn": {
            "title": "HIV Adult Return",
            "slotName": "hiv-nav-group-slot"
          },
          "nav-group#NCDOutpatient": {
            "title": "NCD Outpatient",
            "slotName": "heart-nav-group-slot"
          }
        }
      }
    }
  }
}
Configure the Layout of a Chart Page
Coming Soon
Configure your First Widget
This can be achieved by adding an extension to the patient-chart-allergies-dashboard-slot of the esm-patient-chart-app.
Note: The "color" comes in for the chart visual. The color code you choose dictates the color of the data line in the chart.
{
  "@openmrs/esm-patient-chart-app": {
    "extensionSlots": {
      "patient-chart-allergies-dashboard-slot": {
        "add": [
          "obs-by-encounter-widget#hiv",
          "obs-by-encounter-widget#diabetes"
        ],
        "configure": {
          "obs-by-encounter-widget#hiv": {
            "title": "HIV Widget",
            "resultName": "HIV",
            "data": [
              {
                "concept": "1132AAAAAAAAAAAAAAAAAAAAAAAAAAAAA",
                "label": "sodium",
                "color": "green"
              },
              {
                "concept": "856AAAAAAAAAAAAAAAAAAAAAAAAAAAAA",
                "label": "Viral load",
                "color": "red"
              }
            ],
            "table": {
              "pageSize": 5
            }
          }
        }
      }
    }
  }
}
Part 3: More Advanced Configuration
HFE Form Support in O3
There are 3 possible approaches you could take:
https://github.com/palladiumkenya/openmrs-module-afyastat/blob/1519b9e0b6a7d6b0ac8ac9e1cfe4cbab5c608aa8/README2.md#automation-of-html-to-json-schema-migration
Configuring O3 Forms
Part 1: Decide if you want to use the Demo Form Builder, or set up your own in your distribution.
To use the Demo:
Visit the O3 form builder website.
- OpenMRS Server URL: https://dev3.openmrs.org/openmrs
- u: admin
- p: Admin123
To set up the Form Builder on your own distribution:
The Form Builder (originally built at Ampath) is a GUI tool that helps users create O3 Forms.
- Clone the form builder module from Ampath Repo.
- Run git clone https://github.com/AMPATH/ng2-openmrs-formbuilder.git to clone the repo locally.
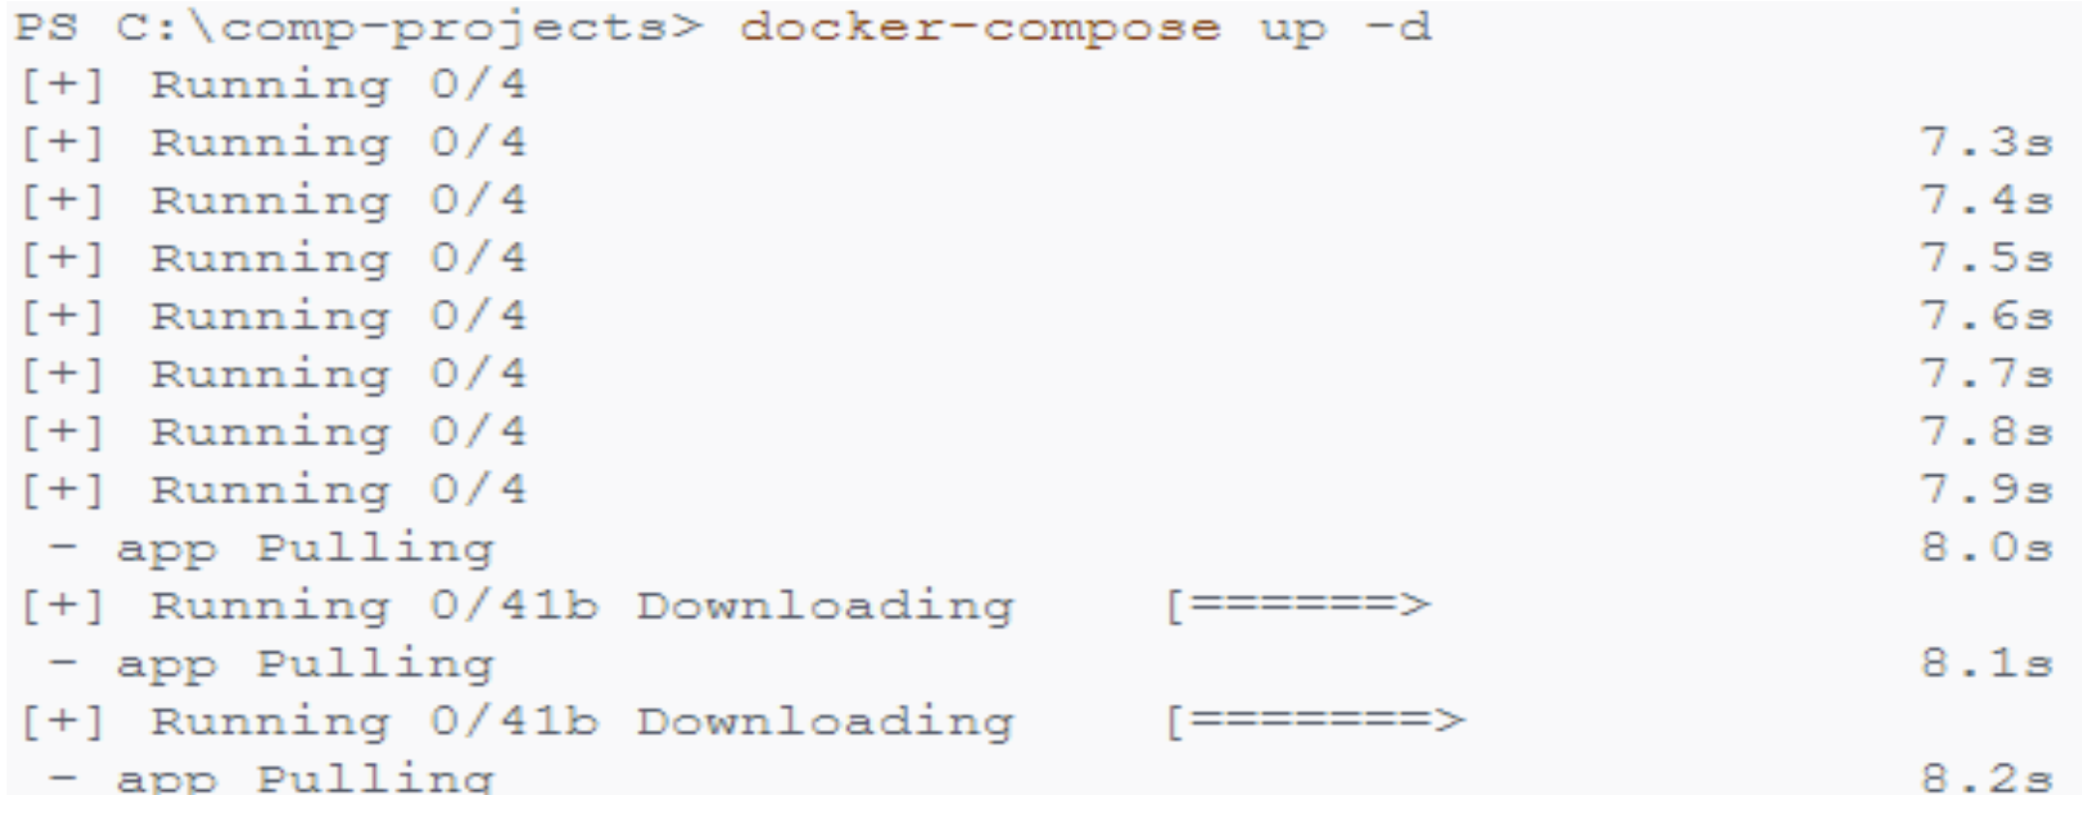
- Install docker-compose if not installed
- Create a file and name it docker-compose.yml with the following information:
version: "3.7"
  services:
  app:
    image: dkibet/formbuilder
    ports:
      - 4200:80
After save the file and run this command docker-compose up -d to download modules as show below.
You're almost there! Now disable google chrome web security with the command below
google-chrome --user-data-dir=~/.config --disable-web-security
Alternatively: Just clone the shortcut for chrome you have on your desktop, and then in the shortcut properties add the parameter --disable-web-security (and --user-data-dir) at the end of chrome executable path
e.g
"C:\Program Files\Google\Chrome\Application\chrome.exe" --disable-web-security --user-data-dir="C:\tmpChromeSession"
Now type in the browser htpp://locahost:4200 and a screen below will be seen.
If you see a screen above that means you have successfully installed Ampath form builder on your local environment.
Now Login with your server URL and user credentials and have fun!
Part 2: Build your forms!
Your BAs or Devs can use the Form Builder UI (shown in the video tutorial on the right) to set up most of the forms.
Complete documentation on Ampath Forms (which will soon be named O3 Forms) is available here: ampath-forms.vercel.app
For example, here is a complete list of common field types used in forms, with examples. The JSON from these examples can even be copy-pasted into the JSON editing field: ampath-forms.vercel.app/field-types-reference
Part 3: Dev adjustments for complex behaviours
There are some logic pieces that get trickier, such as validation logic. This is where your team may want devs to step in to write the JSON rules required. Documentation on how to handle trickier use cases is covered here, e.g. Validating Fields: ampath-forms.vercel.app/validating-fields
How do I get my forms to show up in the Forms Widget?
------
Configuring your Metadata
If you are making a one time setup of your metadata then we highly recommend using Initializer to set up your config. Example 3.x RefApp Configuration folders that are consumed by Initializer can be found here.
Step-by-step documentation on setting up sites with OCL-created concepts via Iniz is here (this is especially helpful if you need to roll-out at many offline sites).
And if you need to update your metadata frequently then you can use OCL for metadata management and use OpenMRS Open Concept Lab module to import concepts using Subscription URL and token or direct import from file.
Configure the Lab Filter feature
The Lab Filter feature enables you to set up custom filter views - eg based on standard medical hierarchies, or even based on your own custom ideas (e.g. "Our Favorite HIV-Related Tests"), like this:
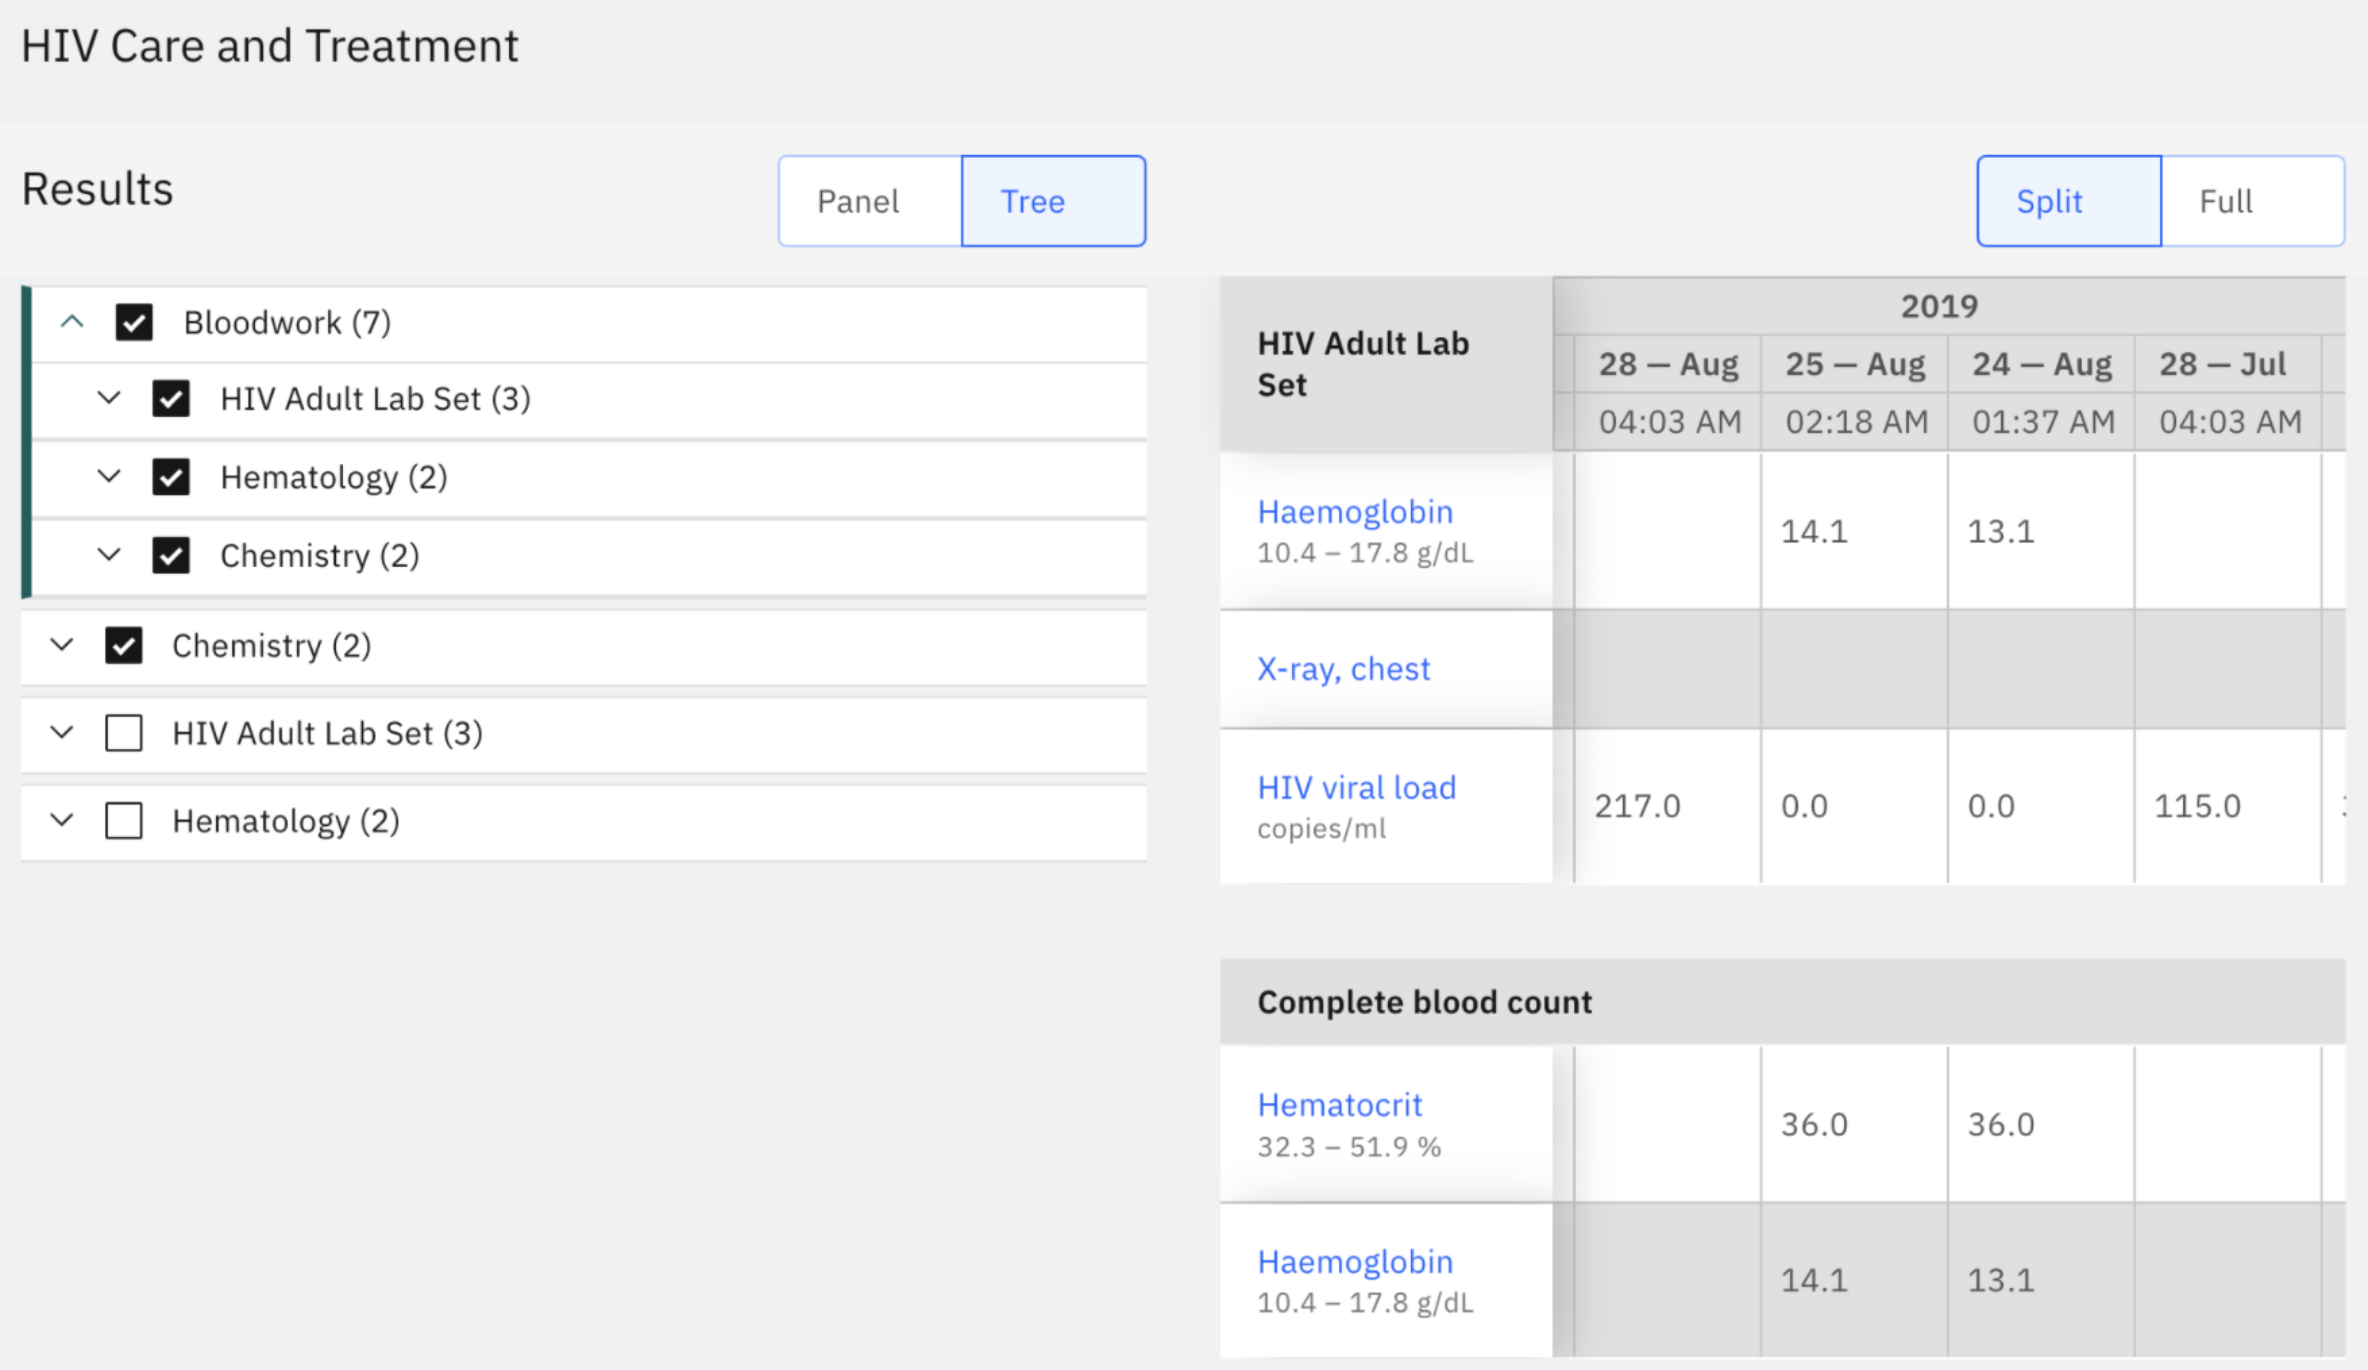
To set up your own preferred Filters and Test Hierarchies, follow the steps in the esm-patient-test-results-app README here.
Add full feature sets with OMRS Packages
Packages will be added through a build step, e.g., by running the SDK’s build-distro command. This functionality is yet to be built. More detail coming soon.
Questions?
- Slack Help Community: You can contact the global community of O3 implementers for support in the OpenMRS slack channel called #openmrs3-helpme (if you do not already have an OpenMRS Slack account, sign up here first.)
- Daily O3 Troubleshooting: Every weekday we have a 30-min daily drop-in for help. Details: Mon-Thurs at 5pm UTC at this link our O3 dev leads host Community Coffee Chats to help with O3 Troubleshooting. GCal info here.